
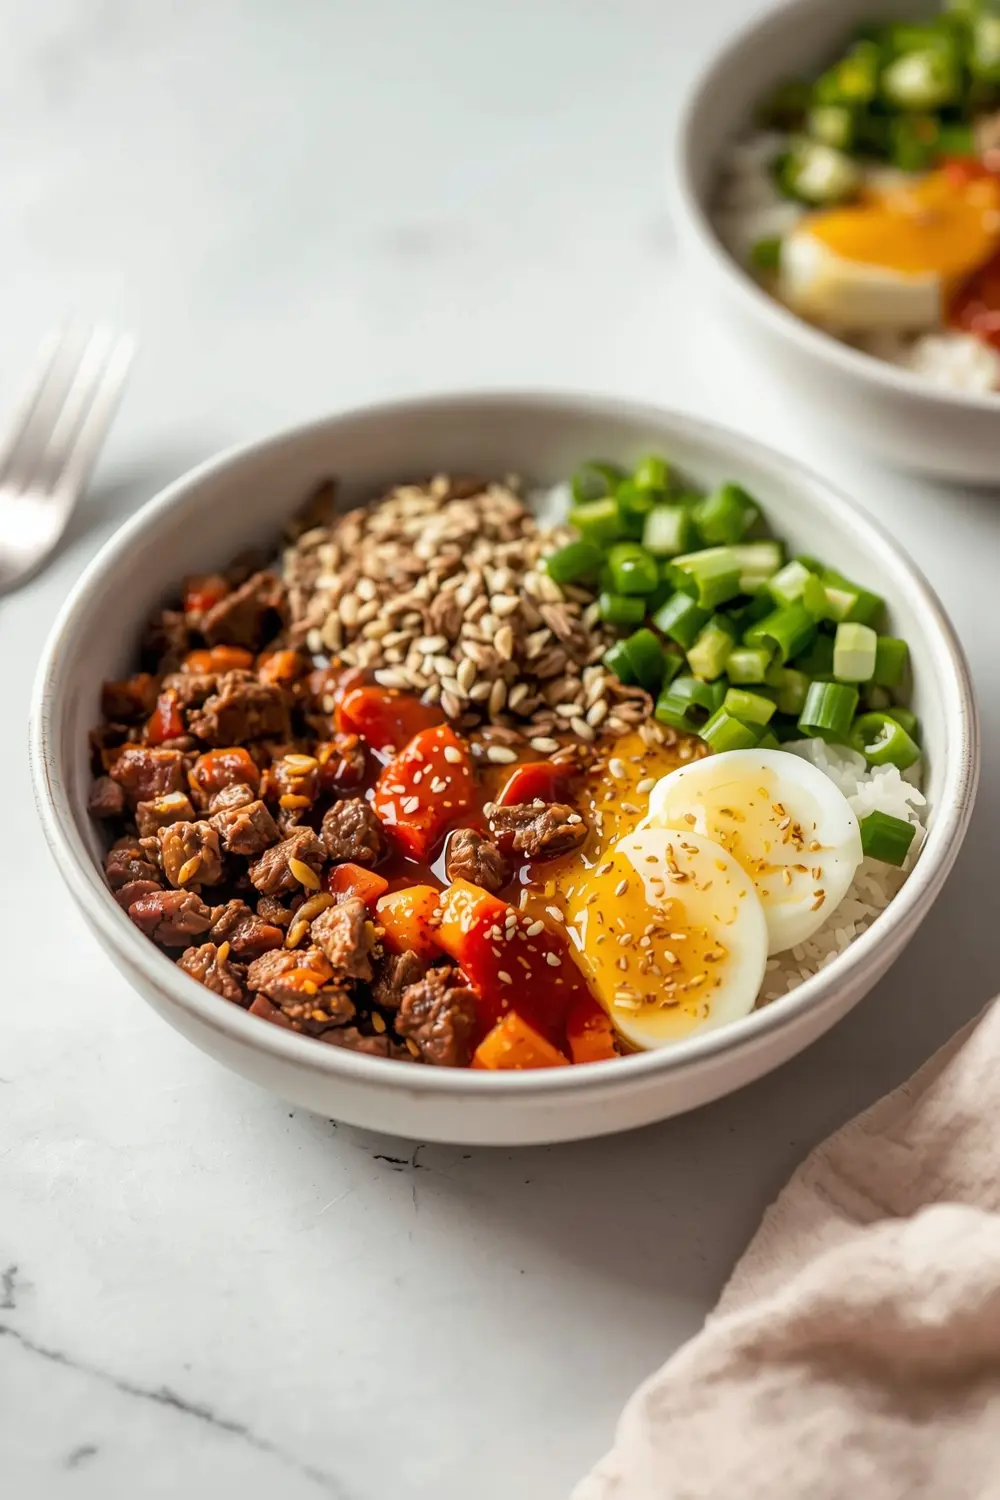
Korean ground beef bowl is literally my go-to when I’ve got 20 minutes and hungry people to feed. This quick dinner comes together faster than you’d think, and honestly, it tastes restaurant-quality from your own kitchen.
I used to buy these bowls at lunch spots until I realized how simple they are to make at home. Now I can’t imagine paying that markup when I’ve got everything I need already. Plus, if you’re into quick Asian-inspired dinners, this one will become your new favorite rotation staple.
The best part? You’ll have this ready before your favorite show even starts. Save this for your next busy weeknight—trust me, you’ll make it at least twice a month once you try it.
Why this Korean ground beef bowl works
Ever had one of those nights where you’re starving but don’t have time for takeout? That’s exactly when I reach for this easy Korean beef recipe. I’ve made this probably fifty times, and my family asks for it by name now.
- Ready in just 20 minutes from start to finish with zero fuss
- Savory gochujang sauce coats the meat perfectly and tastes authentic
- Works great for meal prep since you can portion it into containers
- Only one skillet needed, which means easier cleanup after dinner
| Prep Time | Cook Time | Calories | Servings | Cuisine |
|---|---|---|---|---|
| 10 minutes | 10 minutes | 520 per serving | 2 servings | Korean |
Ingredients for Korean ground beef bowl
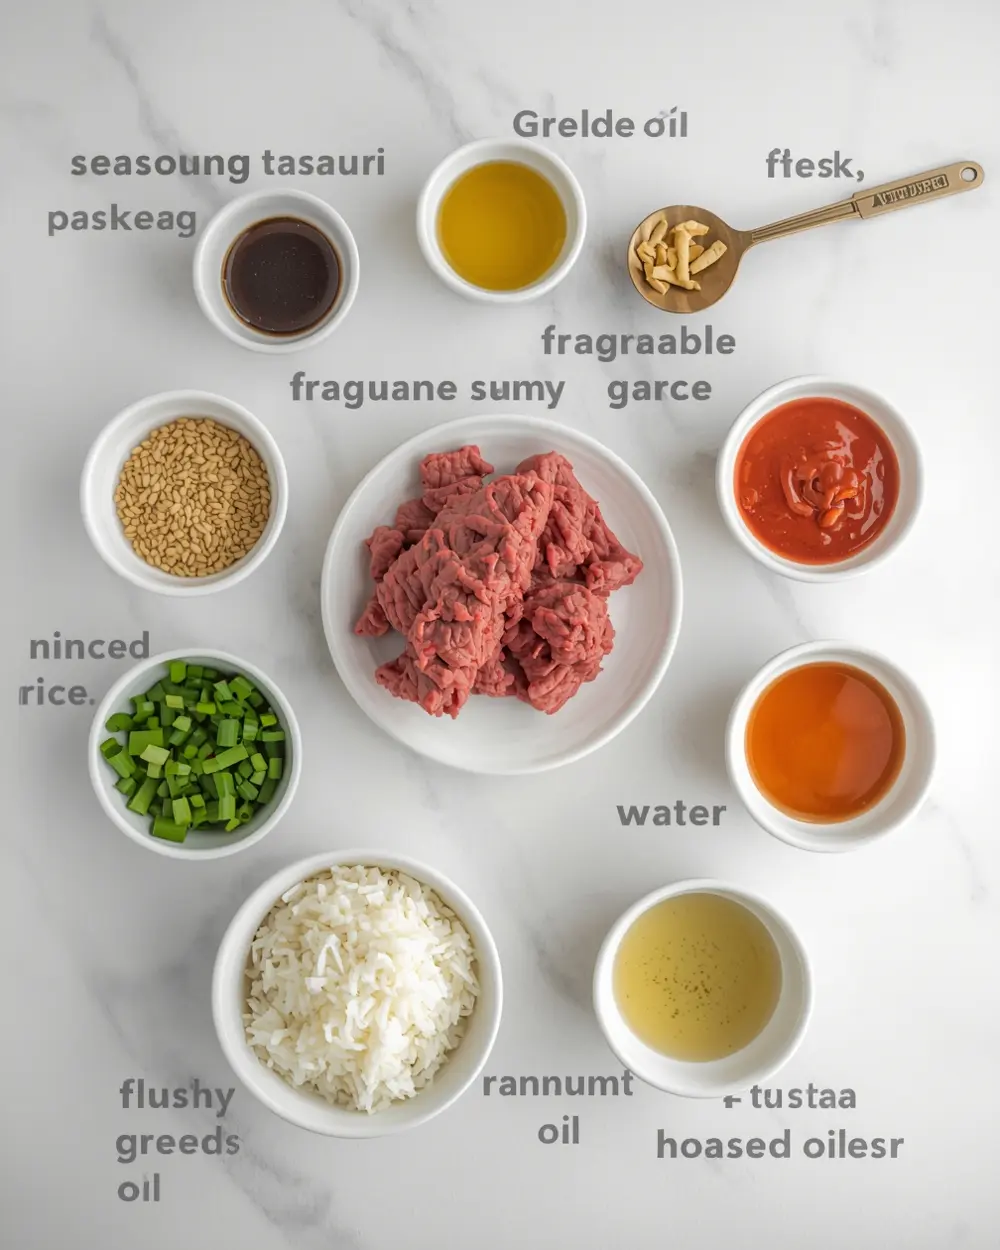
- 1 lb ground beef
- 2 tbsp tamari
- 1 tbsp gochujang
- 1 tsp sesame oil
- 1 tbsp vegetable oil
- 2 cloves garlic, minced
- 1 tsp fresh ginger, grated
- 1 cup cooked white rice
- 2 tbsp chopped green onions
- 1 tsp toasted sesame seeds
- 1 tsp honey
- 1/4 cup water
Can’t find gochujang at your regular grocery store? Most Asian markets carry it, and honestly, it’s totally worth hunting down because that’s what makes this Korean ground beef bowl taste authentic. You’ll find it near the soy sauce section usually.
I’ve swapped the sesame oil for a pinch more vegetable oil when I’m out, though the flavor changes slightly. Don’t skip the ginger though—that’s what takes this from just okay to seriously delicious. Trust me on that one.
Step-by-step instructions
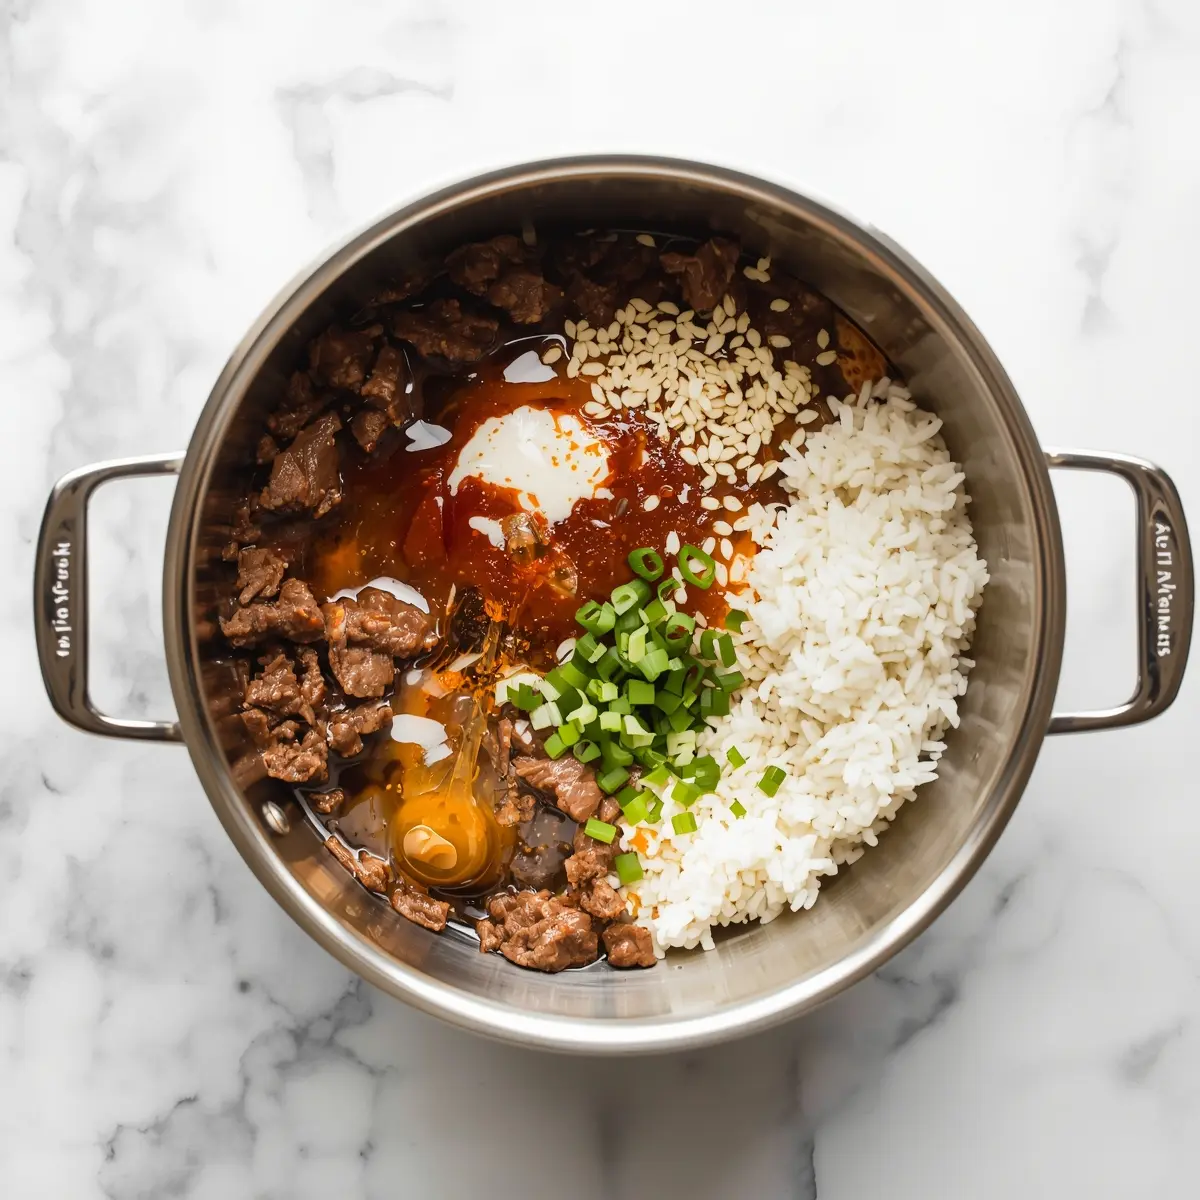
1. Heat your skillet over medium-high heat and add the vegetable oil. Once it’s shimmering, add the ground beef and cook for about 5 minutes, breaking it apart as it browns. Don’t walk away—you want those little bits to get golden, not gray and steamed.
2. Add your minced garlic and grated ginger to the beef, stirring constantly for one minute. You’ll smell that amazing aromatic kick right away, and that’s when you know you’re doing it right. This step’s crucial because it builds the flavor foundation.
3. Pour in the tamari, gochujang, honey, and water, stirring until the gochujang dissolves completely into the sauce. The mixture will look kinda thin at first, but don’t panic if it looks watery. It thickens up as everything simmers together.
4. Reduce heat to medium and let it simmer for about 3-4 minutes until the sauce coats the beef and thickens up nicely. Give it a stir occasionally so nothing sticks to the bottom. My pan always sticks a little bit and that’s totally fine—just add a splash more water if needed.
5. Remove from heat and drizzle in the sesame oil, stirring gently to combine everything together. The sesame oil adds that nutty finish that honestly makes all the difference here. Taste it and adjust salt if needed—the tamari’s already pretty salty though.
6. Divide the cooked rice between 2 bowls, then spoon the Korean ground beef mixture over the top. Layer it generously because this sauce is the star of the show, not just a topping.
7. Finish with green onions and toasted sesame seeds sprinkled on top for that restaurant feel. Honestly, these little touches make it look way fancier than the effort required, which is exactly what we want here.
Serving ideas for Korean ground beef bowl
Top your bowl with whatever sounds good to you—these pairings seriously elevate your meal.
Crispy fried onions and a fried egg
A sunny-side-up egg sitting right on top turns this into something special, and those crispy onions add texture that keeps you coming back for more bites. The runny yolk mixes into the sauce and makes it even more flavorful.Steamed vegetables on the side
Broccoli, carrots, or snap peas complement the beef perfectly and add nutrition without competing for attention. I usually steam them while the beef cooks to keep everything on that 20-minute timeline. This also works beautifully with other quick Asian bowl recipes if you want variety.Pickled cucumber and a dollop of sriracha
The cool, tangy pickles balance out the warm, spicy beef sauce in the best way possible. A little sriracha on the side lets everyone customize their heat level without affecting the whole batch.Pro tips for perfect Korean ground beef bowl
Storage tips
– Store leftovers in airtight containers in the fridge for up to 4 days without any issues – Keep the sauce separate from rice if you’re storing for more than 2 days to prevent sogginess – Freeze the cooked beef mixture alone for up to 3 months in freezer bagsMake-ahead instructions
– Brown the beef and make the sauce up to 2 days ahead, then just reheat and serve – Cook your rice the night before—cold rice actually works great for this Korean ground beef bowl – Prep all your garlic and ginger in the morning so you’re ready to go at dinner timeVariations
– Swap ground beef for ground turkey or chicken breast if you prefer lighter protein options – Add mushrooms, bell peppers, or onions right when you add the garlic and ginger – Use brown rice instead of white rice for extra fiber and heartinessTroubleshooting
– If the sauce is too thin, simmer uncovered for one more minute to let moisture evaporate – Sauce too salty? Add a squeeze of lime juice to balance it out perfectly – Meat sticking to the pan? Lower heat slightly and add a tablespoon of water to loosen it upFrequently asked questions
Can I freeze this Korean ground beef bowl?
Yes, absolutely—freeze the cooked beef mixture in freezer bags for up to 3 months, then thaw overnight in the fridge before reheating. Don’t freeze the rice separately because it gets mushy and changes texture. I usually make a double batch and freeze half, then I’ve got an easy dinner ready for a random busy night.
What if I don’t have gochujang?
You can use sriracha as a substitute, though the flavor profile changes and becomes spicier rather than tangy-spicy. Try using 2 teaspoons sriracha mixed with a bit of soy sauce if you’re in a pinch. It won’t be exactly the same, but it’ll still taste really good honestly.
How do I reheat this the next day?
Reheat in a skillet over medium heat for 2-3 minutes, stirring occasionally until warmed through to 165 degrees Fahrenheit. Alternatively, microwave in a covered bowl for 1-2 minutes, checking halfway through. Add a splash of water if it’s dried out while sitting in the fridge.
Is this easy Korean beef bowl actually quick enough for weeknight dinners?
Completely—you’ll have bowls on the table in exactly 20 minutes, which beats any delivery option. The actual hands-on time is only about 10 minutes since most of it’s just waiting for things to cook. I’ve made this on nights when I literally just got home and it still worked perfectly.
Final thoughts
Not gonna lie, this Korean ground beef bowl has saved my dinner plans more times than I can count. It’s the kind of quick dinner that tastes homemade but doesn’t feel like work, which is basically my definition of perfect.
Your family’s gonna ask for this again and again once they taste it. Check out this easy Korean beef marinade guide if you want to explore more flavor variations down the road.
Honestly, the best part is knowing you can make something this tasty in less time than it takes to order takeout. Pin this for your next busy weeknight and watch how fast it becomes a family favorite.







