

Sweet, buttery, and impossibly cheesy! These Hawaiian roll mini grilled cheese sandwiches bake in the oven for easy batch cooking. Fluffy King’s Hawaiian rolls get sliced, buttered with garlic herb spread, stuffed with cheddar, and baked until golden. Ready in 35 minutes—perfect for soup night or party appetizers.
Since you’re here, make sure to check out these related recipes:
- Hawaiian Roll French Toast
- Quick Buffalo Chicken Grilled Cheese Recipe
- Perfect Caprese Grilled Cheese Restaurant Quality
- Breakfast Grilled Cheese
- Quick Monte Cristo Sandwich Recipe
Why This Hawaiian Roll Grilled Cheese Recipe Works
Ever wonder why batch cooking beats making individual grilled cheese sandwiches one at a time on the stovetop? It’s all about efficiency—baking an entire tray simultaneously saves massive time while achieving consistent golden perfection on every single sandwich.
This Hawaiian roll grilled cheese recipe absolutely nails it every single time. The sweet Hawaiian rolls provide fluffy texture and hint of sweetness that balances sharp cheddar beautifully. Garlic herb butter adds restaurant-quality flavor while baking creates hands-off convenience perfect for busy weeknights.
Here’s what makes these mini grilled cheese sandwiches so irresistibly delicious:
• Bake 12 at once – No standing over a hot skillet flipping individual sandwiches endlessly
• Ready in 35 minutes – Faster than making traditional grilled cheese for the whole family
• Perfect for soup dipping – Mini size makes dunking in tomato soup absolutely effortless
• Kid and adult approved – The sweet-savory combination appeals universally to all ages
The garlic herb butter creates incredible flavor that regular plain butter simply can’t match. Baking rather than pan-frying means less grease and more consistent results. The Hawaiian rolls stay soft inside while developing crispy, golden exteriors. It’s basically comfort food perfection!
Ingredients
Want to know the secret to achieving bakery-quality garlic flavor? Mixing softened butter with seasonings before spreading creates even distribution that tastes professional in every bite.
For the Sandwiches:
• 1 package (12 count) King’s Hawaiian Original Sweet Rolls
• 12 slices sharp cheddar cheese (or enough to cover each roll)
For the Garlic Herb Butter:
• 4 tablespoons unsalted butter, softened to room temperature
• 1/2 teaspoon dried oregano
• 1/2 teaspoon garlic powder
• 1/2 tablespoon fresh parsley, finely chopped (or 1/2 teaspoon dried)
King’s Hawaiian Sweet Rolls are essential for that signature soft, slightly sweet flavor—don’t substitute with regular dinner rolls. Sharp cheddar cheese provides better flavor than mild; use pre-sliced for convenience or freshly slice from a block for premium quality.
The softened butter must be room temperature (not melted!) for proper mixing and spreading. Garlic powder provides concentrated garlic flavor without moisture that fresh garlic adds. Dried oregano adds Italian herb notes while fresh parsley contributes color and freshness. This combination creates restaurant-quality garlic bread flavor.
Step-By-Step Instructions
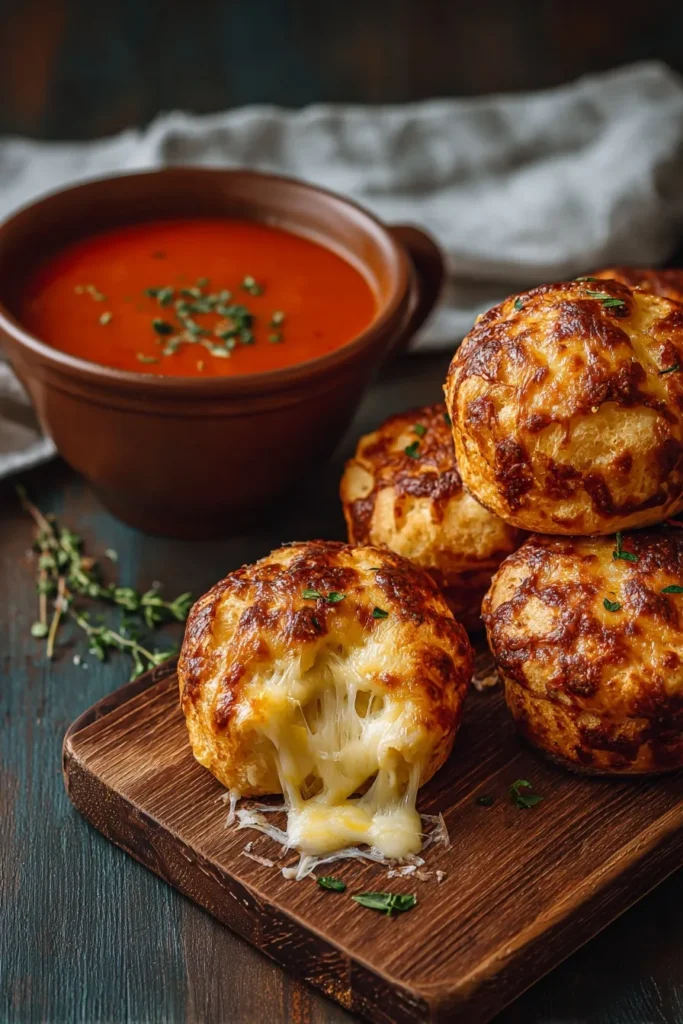
Follow these simple steps for perfectly golden, cheesy Hawaiian roll grilled cheese every time.
1. Preheat Oven
Preheat your oven to 350°F and line a large baking sheet with parchment paper. This moderate temperature bakes rolls through without burning the butter coating. Parchment prevents sticking and makes cleanup completely effortless.
2. Make Garlic Herb Butter
In a small bowl, mix softened butter with oregano, garlic powder, and chopped parsley until thoroughly combined. The butter should be soft enough to mix easily but not melted. This flavored butter is the secret to amazing taste.
3. Separate and Slice Rolls
Carefully separate the Hawaiian rolls from the connected package into 12 individual rolls. Using a serrated knife, slice each roll horizontally into thirds to create 3 thin slices per roll. You’ll use the top and bottom slices for sandwiches.
4. Butter Roll Slices
Spread garlic herb butter generously on the cut sides of each roll slice (both top and bottom pieces). Don’t skip this step—the butter creates that golden, crispy exterior and incredible flavor. Use all the butter mixture.
5. Add Cheese
Place the bottom roll slices butter-side up on the prepared baking sheet. Top each with a slice or two of cheddar cheese, ensuring complete coverage. The cheese should cover the entire roll surface for best melting.
6. Assemble Sandwiches
Place the top roll slices butter-side down onto the cheese-covered bottom slices, creating complete mini sandwiches. Press down gently to help everything adhere. Arrange sandwiches with space between them on the baking sheet.
7. Bake First Side
Bake for 12-15 minutes until the bottoms turn golden brown and cheese starts melting. Check through the oven door—don’t open it until ready to flip or you’ll lose heat.
8. Flip and Finish Baking
Carefully flip each sandwich using a spatula and gently press down. Bake for another 10-12 minutes until the second side turns golden brown and cheese melts completely. The rolls should be crispy outside and soft inside.
9. Cool Slightly and Serve
Remove from oven and let cool for 2-3 minutes before serving—the cheese is molten hot! Serve warm with tomato soup for dipping or as a standalone snack.
Essential Equipment for Hawaiian Roll Grilled Cheese
Large Rimmed Baking Sheet
Professional half-sheet pans provide ample space for arranging 12 sandwiches without crowding. Heavy-gauge aluminum distributes heat evenly for consistent golden browning.
Serrated Bread Knife
Sharp serrated knives slice soft Hawaiian rolls cleanly without squashing or tearing. The saw-tooth edge cuts through fluffy bread perfectly.
Small Mixing Bowl
Quality bowls make mixing garlic herb butter smooth and easy without mess. Glass or ceramic bowls work beautifully for this recipe.
Metal Spatula
Sturdy, thin-edged spatulas slide under delicate sandwiches for flipping without breaking. Offset spatulas provide excellent leverage and control.
Parchment Paper Roll (PREMIUM)
Professional-grade parchment creates foolproof non-stick surfaces and eliminates scrubbing baked-on butter. Rolls let you customize size perfectly for any pan.
Stand Mixer with Paddle (PREMIUM)
Restaurant-quality mixers make whipping flavored butter effortless and perfectly smooth. The paddle attachment incorporates seasonings evenly throughout butter.
What to Serve With Hawaiian Roll Grilled Cheese
Looking for the perfect pairings to complete this comforting meal?
Serve these mini sandwiches alongside my Perfect Caprese Grilled Cheese for an epic grilled cheese variety platter. Multiple flavors keep everyone happy at parties.
Classic tomato soup is the ultimate pairing for dunking these cheesy bites. The sweet-tangy soup complements sweet Hawaiian rolls and sharp cheddar perfectly.
Try my Quick Buffalo Chicken Grilled Cheese for spicy variety. Offering both mild and spicy options satisfies all taste preferences beautifully.
Creamy broccoli cheddar soup creates another excellent dipping option for cheese lovers. The double-cheese combination is incredibly indulgent and satisfying.
Simple green salad with vinaigrette provides fresh, crisp contrast to rich, cheesy sandwiches. The acidity cuts through richness while adding nutritional balance.
Dill pickle spears offer tangy, crunchy accompaniment that balances heavy cheese perfectly. The briny flavor cleanses the palate between bites.
My Breakfast Grilled Cheese creates a complete grilled cheese brunch spread. Multiple variations make entertaining impressive and effortless.
Fresh fruit salad adds color, freshness, and vitamins to balance the meal. The natural sweetness complements savory sandwiches beautifully.
Storage and Reheating Guide
Best Served Fresh
These Hawaiian roll grilled cheese sandwiches taste absolutely best straight from the oven when cheese is melty and bread is crispy. Only bake what you’ll eat immediately for peak deliciousness and texture.
Refrigerator Storage
Store leftover sandwiches in airtight containers in the refrigerator for up to 2 days. The bread softens significantly as it sits. Separate layers with parchment paper if stacking to prevent sticking.
Reheating Instructions
Reheat refrigerated sandwiches in a 350°F oven for 8-10 minutes to restore some crispiness. Arrange on a baking sheet in a single layer. Skip the microwave which makes bread chewy and rubbery.
Freezing Not Recommended
Don’t freeze these sandwiches—the texture becomes unpleasantly soggy after thawing. The soft Hawaiian rolls don’t freeze and reheat well. Always make these fresh for best quality.
Recipe Variations
Want to switch things up and create exciting new flavor combinations?
Ham and Cheese Version
Add thin slices of deli ham between the cheese layers for classic ham and cheese. The salty ham complements sweet rolls beautifully. This creates more substantial, protein-packed sandwiches.
Three Cheese Blend
Mix cheddar, mozzarella, and provolone for ultimate cheesy goodness. The combination creates incredible melty, stretchy texture. Cheese lovers go absolutely crazy for this version using my Hawaiian Roll French Toast technique.
Bacon Lovers’ Dream
Add cooked crispy bacon pieces with the cheese for smoky, salty crunch. Use 6-8 slices bacon, cooked and crumbled. This breakfast-inspired version works anytime.
Pizza Grilled Cheese
Spread marinara sauce inside and add mozzarella cheese and pepperoni. The pizza flavors transform these into Italian-inspired treats. Kids especially love this fun variation.
Ranch Seasoning Style
Replace garlic powder and oregano with 2 tablespoons ranch seasoning mix in the butter. The tangy, herbaceous ranch flavor is incredibly addictive. This trendy version photographs beautifully.
Jalapeño Popper Style
Add diced jalapeños and cream cheese along with cheddar for spicy kick. The cream cheese adds tanginess and smooth texture. Adults love this grown-up variation.
Pro Tips & Tricks
Curious about the insider secrets that guarantee perfect results every single time?
• Use room temperature butter—cold butter won’t mix smoothly with seasonings
• Slice rolls horizontally into thirds—this creates perfect mini sandwich proportions
• Butter both sides of each roll slice generously for maximum flavor and crispiness
• Use sharp cheddar rather than mild for flavor that stands up to sweet rolls
• Press gently after flipping to help cheese spread and melt evenly throughout
• Check after 10 minutes the first time—oven temperatures vary significantly
• Let cool 2-3 minutes before serving—molten cheese burns mouths easily
• Double the batch and freeze half the garlic butter for next time
Frequently Asked Questions
Q: Can you make Hawaiian roll grilled cheese ahead of time?
Assemble sandwiches up to 2 hours ahead and refrigerate covered until ready to bake. Add 5 extra minutes to baking time if starting cold. Don’t assemble more than 2 hours ahead or bread gets soggy.
Q: How long do Hawaiian roll grilled cheese last?
Store leftovers refrigerated for up to 2 days in airtight containers. The texture deteriorates significantly over time. These taste best eaten fresh from the oven when cheese is melty.
Q: Can you freeze Hawaiian roll grilled cheese?
Freezing isn’t recommended—the soft Hawaiian rolls become soggy and unpleasant after thawing. The texture never recovers properly. Always make these sandwiches fresh for best results.
Q: Why use Hawaiian rolls instead of regular bread?
Hawaiian rolls provide slight sweetness that balances sharp cheddar while staying incredibly soft and fluffy. The sweet-savory combination creates unique, addictive flavor regular bread can’t match.
Q: Can you make these on the stovetop?
Yes, but baking is much easier for multiple sandwiches simultaneously. Stovetop requires constant attention and flipping. Oven method creates consistent results with minimal effort. My Quick Monte Cristo Sandwich shows stovetop techniques.
Q: What cheese works best for Hawaiian roll grilled cheese?
Sharp cheddar provides the best flavor balance with sweet rolls. Mild cheddar tastes too subtle. American cheese melts beautifully but lacks flavor depth. Mix cheeses for interesting combinations.
Q: Can you add other ingredients besides cheese?
Absolutely! Add ham, bacon, tomatoes, or different cheeses for variety. Keep additions thin so sandwiches close properly. Too many fillings prevent good melting.
Q: How do you keep the rolls from getting soggy?
Don’t over-butter or use melted butter which soaks in. Don’t assemble too far ahead. Serve immediately after baking for crispiest results. Room temperature butter spreads without soaking.
Q: Can kids help make these sandwiches?
Yes! Kids can help mix butter, spread it on rolls, and add cheese. Supervise knife work and oven use. This is a great family cooking project everyone enjoys.
Q: What soup pairs best with these?
Classic tomato soup is traditional and perfect for dunking. Broccoli cheddar soup works wonderfully too. Any creamy soup complements these cheesy sandwiches beautifully.
Q: How do you prevent burning the butter?
Bake at 350°F (not higher) and watch carefully during the last few minutes. If tops brown too quickly, tent loosely with foil. Every oven temperature varies slightly.
Q: How many servings does this recipe make?
This makes 12 mini sandwiches, serving 4-6 people depending on appetite and what else you’re serving. Double the recipe easily for larger crowds. My Perfect Caprese Grilled Cheese feeds crowds beautifully too.
Ready to Make These Mini Grilled Cheese?
These Hawaiian roll grilled cheese sandwiches deliver ultimate comfort food in adorable, dippable form. The combination of sweet fluffy rolls, sharp melted cheddar, and garlic herb butter creates the most crave-worthy lunch or snack ever.
Save this recipe for easy weeknight dinners and share it with friends who love comfort food! Leave a comment if you try these—I’d love to hear if they become your new favorite. 🙂







