
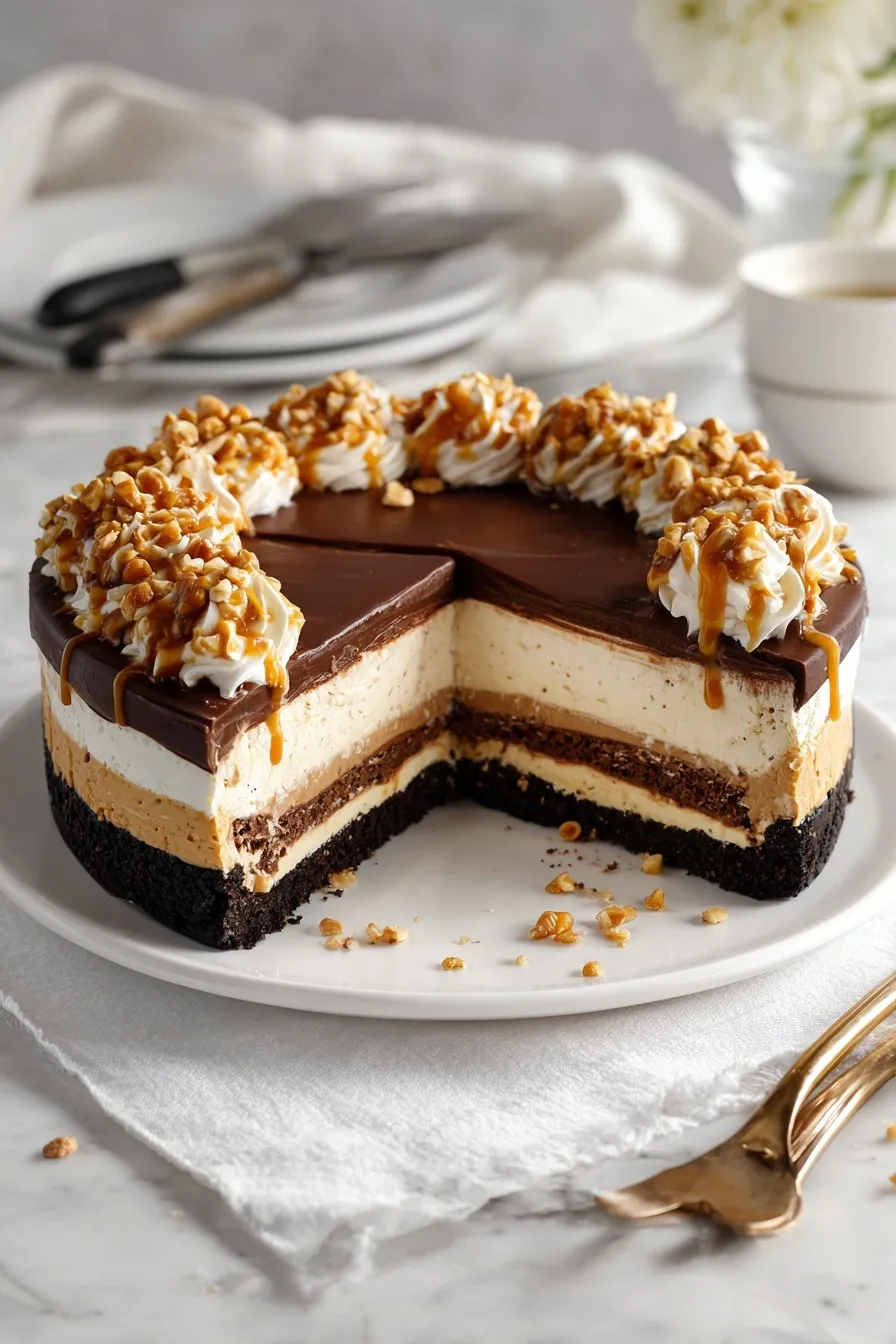
This no-bake peanut butter pie delivers rich, creamy peanut butter filling in a crunchy Oreo crust—no oven required! Perfect for peanut butter lovers craving an easy, impressive dessert that tastes like it came from a bakery.
Since you’re here, make sure to check out these related recipes:
Ultimate No-Bake Oreo Cheesecake
Foolproof Nutella Ferrero Rocher Cookie Pie
Copycat Crumbl Salted Caramel Cheesecake
Lemon Raspberry Swirl Cheesecake Recipe
Why This Peanut Butter Pie Recipe Works
Ever wonder why restaurant peanut butter pie tastes so much richer than homemade versions? The secret lies in the perfect ratio of cream cheese to peanut butter, creating that signature mousse-like texture.
This no-bake peanut butter pie combines creamy filling with crunchy Oreo crust for incredible contrast. The recipe requires zero baking skills—just mixing and chilling. Here’s what makes it foolproof:
• No-bake convenience means you can make it on hot summer days without heating up your kitchen
• Make-ahead friendly design lets you prepare it 1-2 days before serving for stress-free entertaining
• Crowd-pleasing flavor appeals to both kids and adults—I’ve never had leftovers
• Professional presentation looks bakery-quality with minimal effort and simple garnishes
The cream cheese adds tanginess that balances the sweetness perfectly. Meanwhile, the Oreo crust provides texture that keeps every bite interesting. This combination creates a dessert that’s rich but never cloying.
Ingredients
Want to know the secret to that perfect creamy texture? It’s all about using full-fat ingredients—don’t skimp here!
For the Oreo Crust:
• 36 Oreo cookies (including the cream filling)
• 4 tablespoons unsalted butter, melted
For the Peanut Butter Filling:
• 8 ounces cream cheese, softened to room temperature (critical for smooth texture)
• 1 cup creamy peanut butter (use conventional brands like Jif or Skippy, not natural)
• 1 cup powdered sugar, sifted
• 1 teaspoon pure vanilla extract (alcohol-free vanilla paste works perfectly)
• 1½ cups heavy whipping cream, cold
• 2 tablespoons powdered sugar (for whipping cream)
For the Topping:
• ½ cup heavy whipping cream
• 1 tablespoon powdered sugar
• Chocolate shavings or mini peanut butter cups for garnish
The cream cheese must be room temperature or you’ll have lumps. Trust me, I learned this the hard way! The peanut butter should be creamy style—natural peanut butter separates and creates grainy texture.
Step-by-Step Instructions
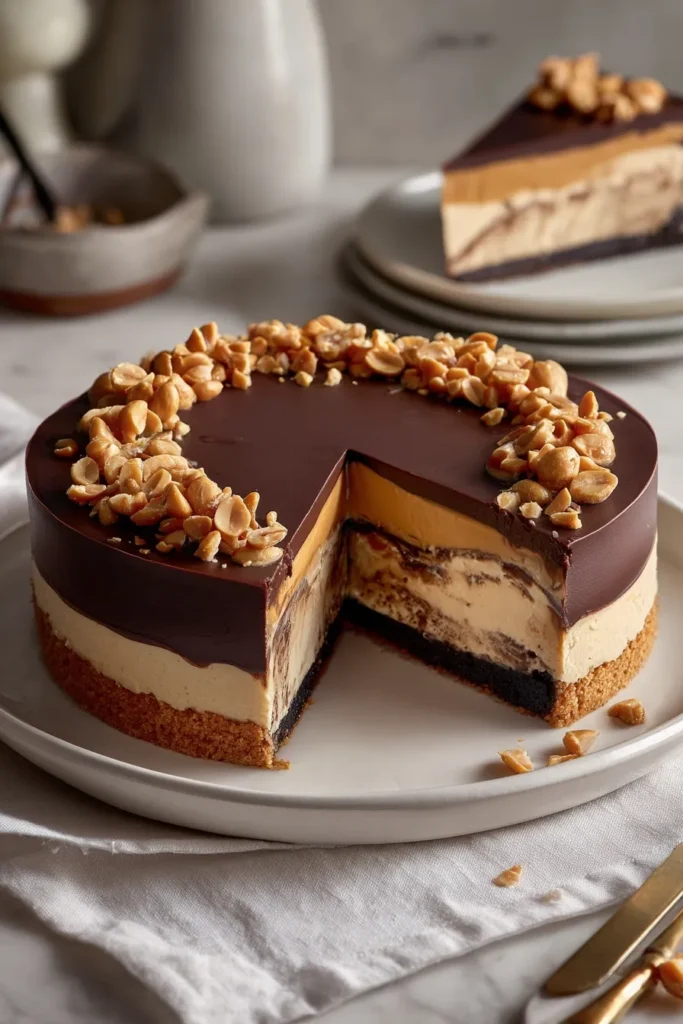
1. Prepare the Oreo crust first. Place Oreos in a food processor and pulse until you have fine, uniform crumbs—no large chunks. Add melted butter and pulse 5-6 times until mixture resembles wet sand. Press firmly into a 9-inch pie pan using a measuring cup to pack it down. Chill for 30 minutes minimum while preparing filling.
2. Make the peanut butter filling base. Beat softened cream cheese in a large bowl with an electric mixer on medium speed for 2-3 minutes until completely smooth and fluffy. Add peanut butter, 1 cup powdered sugar, and vanilla extract. Beat for another 2 minutes until thoroughly combined with no lumps visible.
3. Whip the cream separately. In a separate cold bowl, beat 1½ cups heavy cream with 2 tablespoons powdered sugar on high speed until stiff peaks form (about 3-4 minutes). The cream should hold its shape when you lift the beaters. Don’t overbeat or you’ll make butter!
4. Fold cream into peanut butter mixture. Add one-third of the whipped cream to peanut butter mixture and stir gently to lighten it. Then add remaining whipped cream and fold carefully with a rubber spatula—don’t stir vigorously or you’ll deflate the airiness. Use gentle up-and-over motions until just combined.
5. Fill the pie shell. Pour filling into chilled Oreo crust and smooth the top with an offset spatula or the back of a spoon. Create gentle swirls for a professional look if desired. The filling should dome slightly in the center.
6. Chill thoroughly before serving. Cover pie loosely with plastic wrap (don’t let it touch the filling) and refrigerate for at least 4 hours or overnight. The pie needs time to firm up properly—don’t rush this step!
7. Add final toppings before serving. Whip remaining ½ cup cream with 1 tablespoon powdered sugar until stiff peaks form. Pipe or dollop around edges of pie. Garnish with chocolate shavings or chopped peanut butter cups for bakery-style presentation.
Essential Equipment for Peanut Butter Pie
Food Processor (7-Cup Capacity)
A quality food processor pulverizes Oreos into uniform crumbs in seconds, preventing clumpy crust. Manual crushing never achieves the fine, even texture needed for proper crust binding.
9-Inch Pie Pan (Deep-Dish Style)
Deep-dish pans accommodate the thick, creamy filling without overflow. Glass or ceramic pans showcase the beautiful layers through the sides.
Electric Hand Mixer (5-Speed Minimum)
Consistent mixing speed creates silky smooth filling without overbeating. The multiple speeds let you control texture from gentle folding to stiff peaks.
Large Mixing Bowls (Set of 2-3)
Separate bowls keep filling components organized during assembly. Stainless steel bowls chill quickly for perfect whipped cream consistency.
Professional-Grade Stand Mixer (PREMIUM)
Restaurant-quality KitchenAid-style mixers whip cream to stiff peaks in half the time. The hands-free operation lets you prep other components simultaneously.
Flexible Rubber Spatula (Heat-Resistant)
Professional silicone spatulas fold whipped cream without deflating precious air bubbles. The flexibility scrapes every bit of filling from bowl sides.
What to Serve With Peanut Butter Pie
Looking for the perfect accompaniments to complete your dessert spread?
Serve with my Best Lemonade Ever Recipe for a refreshing contrast to the rich filling. The tartness cuts through the creamy sweetness beautifully. Hot coffee or espresso also pairs wonderfully—the bitter notes enhance the peanut butter flavor.
Try my Homemade Vanilla Punch Recipe for parties and gatherings. It’s crowd-pleasing and complements the dessert perfectly. Fresh berries on the side add color and a tart element that balances the richness.
Chocolate sauce drizzle transforms this into a peanut butter cup experience. Caramel sauce works equally well for those who prefer sweeter combinations. A sprinkle of sea salt on top before serving adds sophisticated depth.
Consider serving small slices—this pie is incredibly rich and satisfying. One slice goes a long way! Pair with vanilla ice cream if you’re feeling extra indulgent.
Storage and Reheating Guide
Refrigerator Storage
Store leftover peanut butter pie covered tightly with plastic wrap for up to 5 days in the refrigerator. The filling stays creamy and delicious throughout this time. Place plastic wrap directly on the surface to prevent skin formation, or use an airtight pie keeper for best results.
Freezer Storage
Freeze peanut butter pie for up to 2 months wrapped in plastic wrap, then aluminum foil. Slice before freezing for easy single servings—just grab and thaw as needed. The texture remains remarkably creamy after thawing, though the whipped cream topping may deflate slightly.
Thawing Instructions
Thaw frozen pie overnight in the refrigerator for best texture—never at room temperature. Individual slices thaw in 2-3 hours in the fridge. Add fresh whipped cream and garnishes after thawing for picture-perfect presentation.
Pro Storage Tips
• Always let the pie chill completely before covering to prevent condensation
• Store away from strong-smelling foods as the filling absorbs odors easily
• For parties, keep chilled until 10-15 minutes before serving for easier slicing
Recipe Variations
Want to switch things up with different flavors and styles?
Chocolate Peanut Butter Pie
Replace 1/4 cup peanut butter with melted dark chocolate for deeper flavor. Swirl the chocolate through filling before chilling for a marbled effect. Use my Cookie Dough Brownies Recipe technique for the chocolate swirl pattern.
Peanut Butter Banana Cream Pie
Layer sliced bananas over the Oreo crust before adding filling. The banana adds natural sweetness and complements peanut butter perfectly. Use firm, just-ripe bananas to prevent mushiness.
Keto-Friendly Peanut Butter Pie
Substitute powdered erythritol for regular powdered sugar throughout. Use sugar-free Oreos for the crust or make an almond flour crust instead. The texture stays remarkably similar with these swaps.
Nutter Butter Crust Version
Replace Oreos with Nutter Butter cookies for double peanut butter flavor. The sandy texture creates an even crunchier base. This variation is peanut butter lover’s dream come true!
Mini Peanut Butter Pie Cups
Divide crust and filling among muffin tins lined with cupcake papers. These individual servings are perfect for parties and portion control. Freeze well for grab-and-go desserts anytime.
Salted Caramel Swirl
Drizzle 3-4 tablespoons salted caramel sauce over filling before chilling. Swirl gently with a knife for beautiful presentation. The sweet-salty combination is absolutely addictive.
Pro Tips & Tricks
Curious about the insider secrets that make this foolproof?
• Use room temperature cream cheese exclusively—cold cream cheese creates impossible-to-remove lumps no matter how long you beat it
• Don’t use natural peanut butter for this recipe as the oil separation creates grainy, unstable filling that won’t set properly
• Press the Oreo crust very firmly using a flat-bottomed measuring cup—wimpy pressing leads to crumbly crust that falls apart when slicing
• Fold whipped cream gently using up-and-over motions rather than stirring, which deflates the airiness you worked to create
• Chill mixing bowl and beaters for 10 minutes before whipping cream for faster, more stable peaks that hold shape longer
• Test cream cheese softness by pressing with your finger—it should indent easily but not feel greasy or melted
• Add a pinch of salt to the filling if your peanut butter is unsalted—it dramatically enhances the flavor complexity
• Run your knife under hot water between slices for clean, professional cuts without dragging through the filling
Frequently Asked Questions
Q: Can you make peanut butter pie ahead of time?
Absolutely! Make this no-bake peanut butter pie up to 2 days ahead and store covered in the refrigerator. The flavors actually meld and improve after a day of chilling. Add the whipped cream topping and garnishes just before serving for freshest presentation.
Q: How long does peanut butter pie last in the fridge?
Store properly covered peanut butter pie for up to 5 days in the refrigerator. The filling remains creamy and delicious throughout. Always keep it chilled as the cream-based filling is perishable.
Q: Can you freeze peanut butter pie?
Yes! Freeze for up to 2 months wrapped tightly in plastic wrap and foil. Thaw overnight in the refrigerator before serving. The texture stays remarkably creamy, though you may want to add fresh whipped cream topping.
Q: What to serve with peanut butter pie?
Coffee or espresso cuts through the richness beautifully and enhances the peanut butter flavor. Fresh berries, chocolate sauce, or my Homemade Chocolate Sauce make excellent accompaniments. Keep portions small as this pie is incredibly rich.
Q: Why is my peanut butter pie runny?
The filling needs at least 4 hours to set properly—don’t rush the chilling time. Using natural peanut butter instead of conventional creates loose, unstable filling. Make sure your whipped cream reached stiff peaks before folding.
Q: Can I use natural peanut butter in peanut butter pie?
Conventional peanut butter works best as natural varieties have oil separation issues. The stabilizers in regular peanut butter create proper texture and stability. Jif, Skippy, or Peter Pan deliver consistent results every time.
Q: How do I prevent my Oreo crust from falling apart?
Press the mixture firmly and evenly into the pan using a measuring cup bottom—don’t be gentle! Use exactly 4 tablespoons melted butter for proper binding. Chill for 30 minutes minimum before filling.
Q: What’s the best way to slice peanut butter pie?
Run a sharp knife under hot water, dry it, then slice in one smooth motion. Clean and reheat the knife between each slice for professional-looking cuts. Let pie sit at room temperature for 10 minutes before slicing for easiest cutting.
Q: Can you make peanut butter pie without cream cheese?
Cream cheese provides essential structure and tang that balances sweetness perfectly. Without it, you’ll need to use a different recipe entirely. The cream cheese is non-negotiable in this particular version.
Q: How many servings does peanut butter pie make?
One 9-inch pie serves 8-10 people generously—this dessert is incredibly rich! Cut smaller slices for parties as a little goes a long way. Most guests are satisfied with a modest portion.
Q: What toppings go with peanut butter pie?
Chocolate shavings, mini peanut butter cups, or my Whipped Cottage Cheese Recipe all work beautifully. Crushed pretzels add salty crunch, while caramel drizzle creates candy bar vibes. Fresh whipped cream is essential for presentation.
Q: Why did my whipped cream deflate in the filling?
You likely stirred too vigorously instead of gently folding with up-and-over motions. Overbeaten whipped cream also deflates quickly—stop beating immediately when stiff peaks form. Use cold cream and chilled bowl for most stable results.
Ready to Make This Irresistible Dessert?
This no-bake peanut butter pie recipe delivers bakery-quality results with minimal effort and zero oven time. The combination of creamy filling and crunchy Oreo crust creates texture perfection in every bite. Whether you’re serving it for holidays, potlucks, or just because you’re craving something indulgent, this recipe never disappoints.
The make-ahead convenience means you can prep stress-free for any gathering. Just chill, slice, and watch it disappear! I promise this will become your go-to impressive dessert that everyone requests repeatedly.
Save this peanut butter pie recipe for your next celebration—you’ll be so glad you did! Leave a comment below if you try it and let me know what toppings you added. Share with fellow peanut butter lovers who need this in their lives!
Looking for even more ideas? My Thanksgiving Sides Revolution cookbook has more than 25 elevated recipes. → Get instant access







